dw可以做有后台的网站么?十种营销方式
1、什么是递归?
程序调用自身的编程技巧称为递归。
递归作为一种算法在程序设计语言中广泛应用。一个过程或函数在其定义或说明中有直接或间接调用自身的一种方法,它通常把一个大型复杂的问题层层转化为一个与原问题相似的规模较小的问题来求解,递归策略只需要少量的程序就可描述出解题过程所需的多次重复计算,大大减少了程序的代码量。
递归的主要思考方式在于:把大事化小
2、递归的两个必要条件
存在限制条件(可停止),当满足这个限制条件的时候,递归便不再继续。
每次递归调用之后越来越接近这个限制条件。
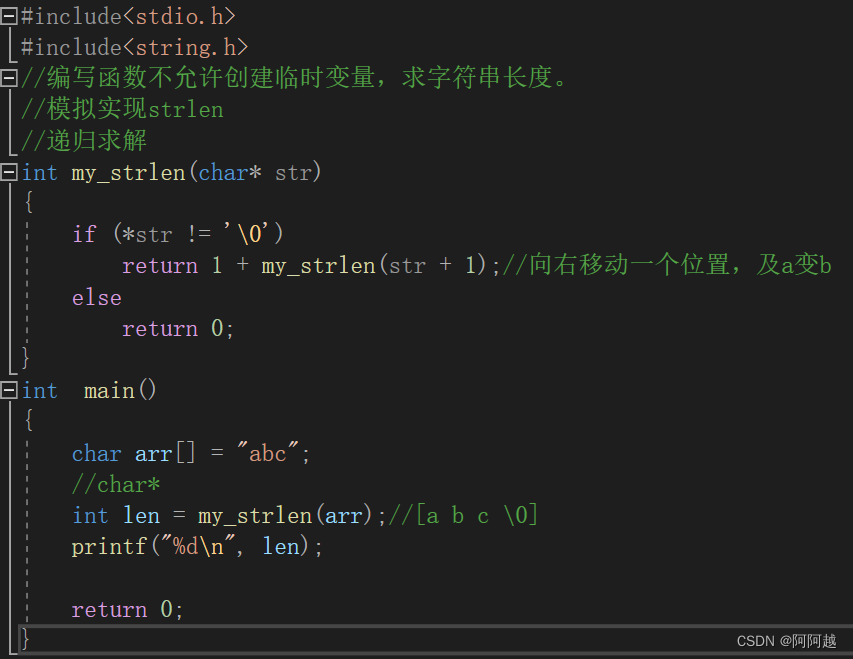
练习1、

if语句是必要的,不然会栈区溢出。
练习2、

递归求解