社保局网站建设意义wordpress is front
Lucene及概念介绍
- 基础概念
- 倒排索引
- 索引合并
- 分析
- 查询语句的构成
基础概念
Document:我们一次查询或更新的载体,对比于实体类
Field:字段,是key-value格式的数据,对比实体类的字段
Item:一个单词,这个单词就是建立倒排索引的一项
Token:一个Item的一次匹配,包含Item、开始位置、结束位置、类型等信息。
倒排索引
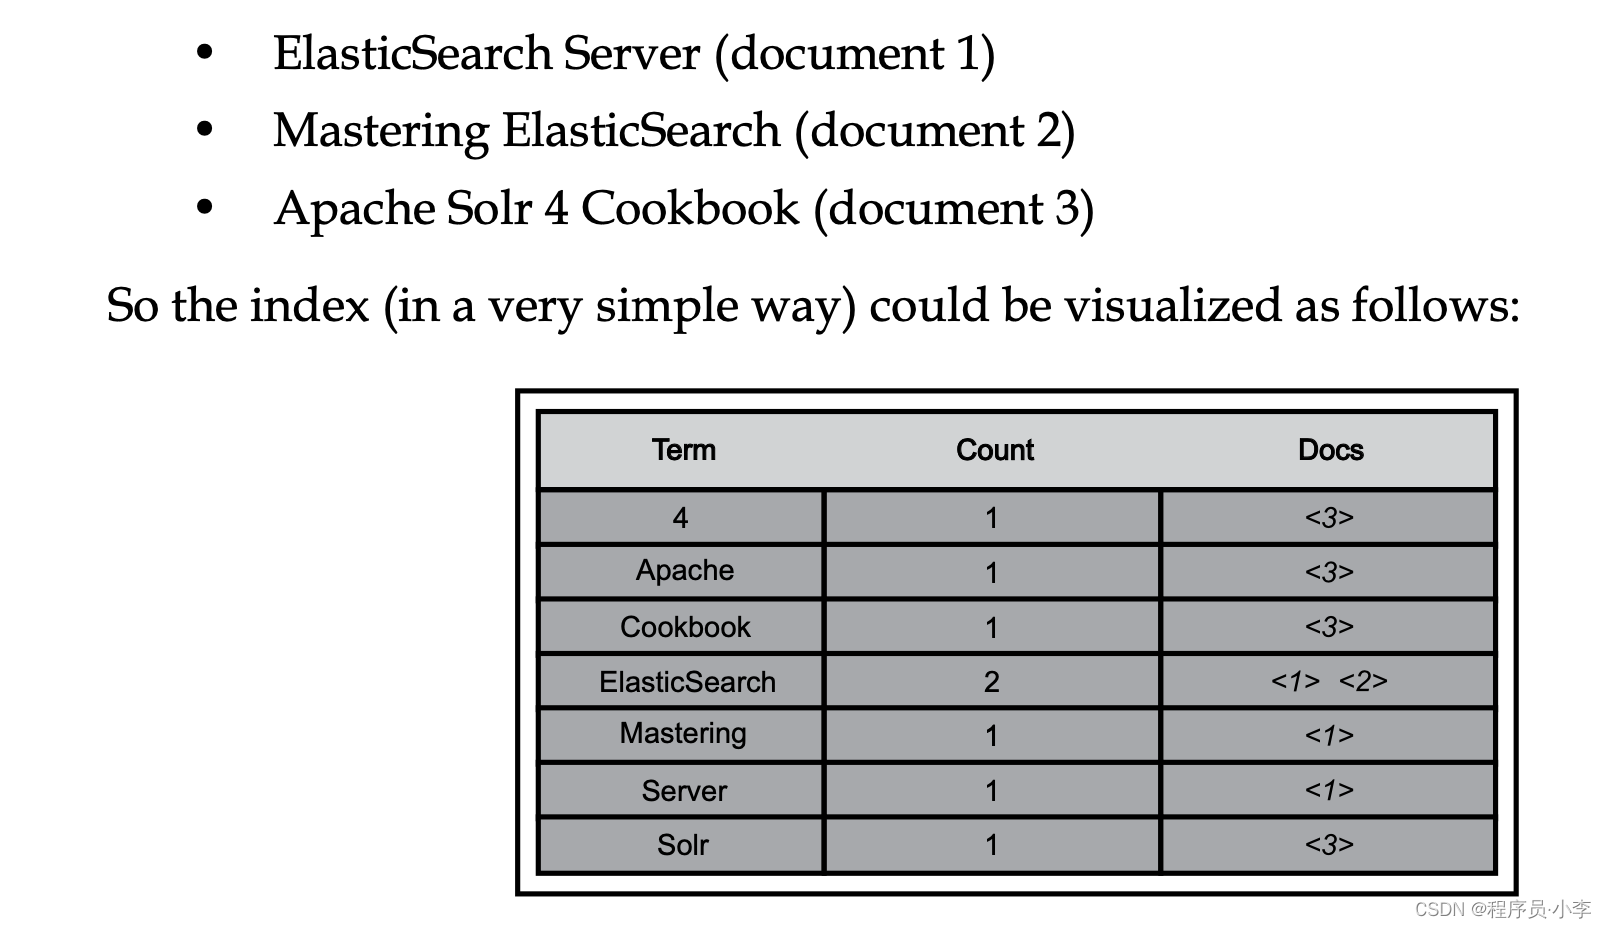
倒排索引相当于做了两个操作:
- 分词
- 建立索引
分词就是把文本进行分割,形成多个小的Item,建立索引就是将分词和原数据建立关联关系。
索引合并
单个索引会分割成多个小块进行存储,而这些小块一经写入不会再更新。当我们的查询设计到多个小块时,查询效率会降低,因此需要合并多个小块来提升查询效率,这个操作就是索引合并。索引合并是需要占用IO的,因此一般不要强制索引合并。
分析
原始Document拆分成倒排索引和新的查询语句拆分成允许被搜索的选项的操作都会涉及到”分析“
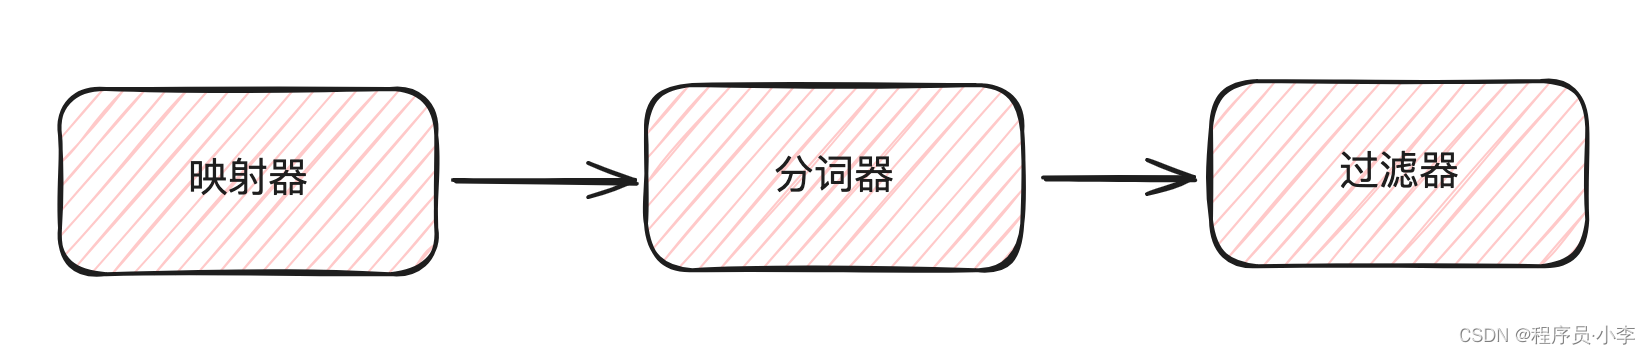
分词器:将文本进行分割,拆分成索引的工具
映射器:对文本进行处理,映射成其他数据
过滤器:对拆分后的文本进行过滤,例如隐私处理等。
三个部分的处理顺序如下:
查询语句的构成
查询语句主要分为term和操作符两部分,term就是分词的匹配项,而操作符用于描述本次查询的多个term之间的匹配关系
| 操作符 | 作用 |
|---|---|
| AND | 表示同时匹配关系 |
| OR | 表示同时或关系 |
| NOT | 表示同时否定匹配关系 |
| + | 表示同时确认匹配关系 |
| - | 表示否定匹配关系 |
| () | 表示关系优先级绑定 |
| ? | 表示单字符通配 |
| * | 表示多字符通配 |
| ~ | 表示模糊查询 |
| [] | 表示闭区间范围查询 |
| {} | 表示开区间范围查询 |