全景网站开发温州市建设工程质监站网站
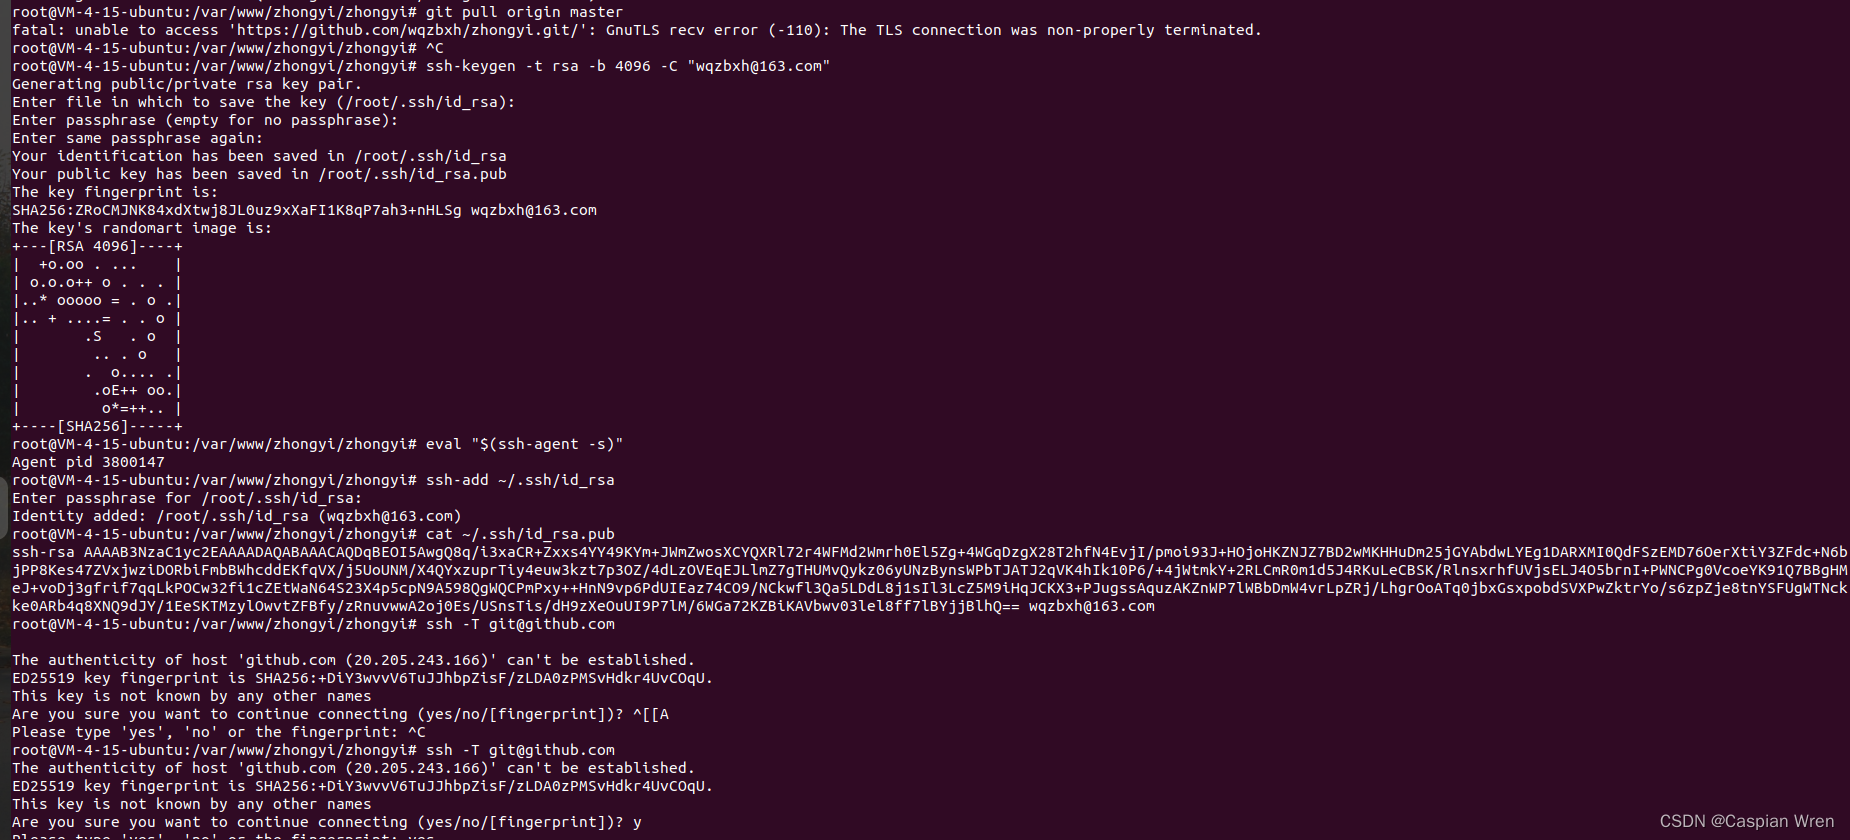
1. 生成 SSH 密钥
打开终端,运行以下命令来生成 SSH 密钥:
ssh-keygen -t rsa -b 4096 -C "wqzbxh@example.com"替换 "wqzbxh@example.com" 为你在 GitHub 注册时使用的邮箱地址。
2. 添加 SSH 密钥到 SSH 代理
运行以下命令来启动 SSH 代理:
eval "$(ssh-agent -s)"然后将生成的密钥添加到代理:
ssh-add ~/.ssh/id_rsa3. 复制 SSH 公钥
运行以下命令来复制 SSH 公钥:
cat ~/.ssh/id_rsa.pub将输出的公钥复制到你的 GitHub 或其他 Git 托管服务的账户设置中。
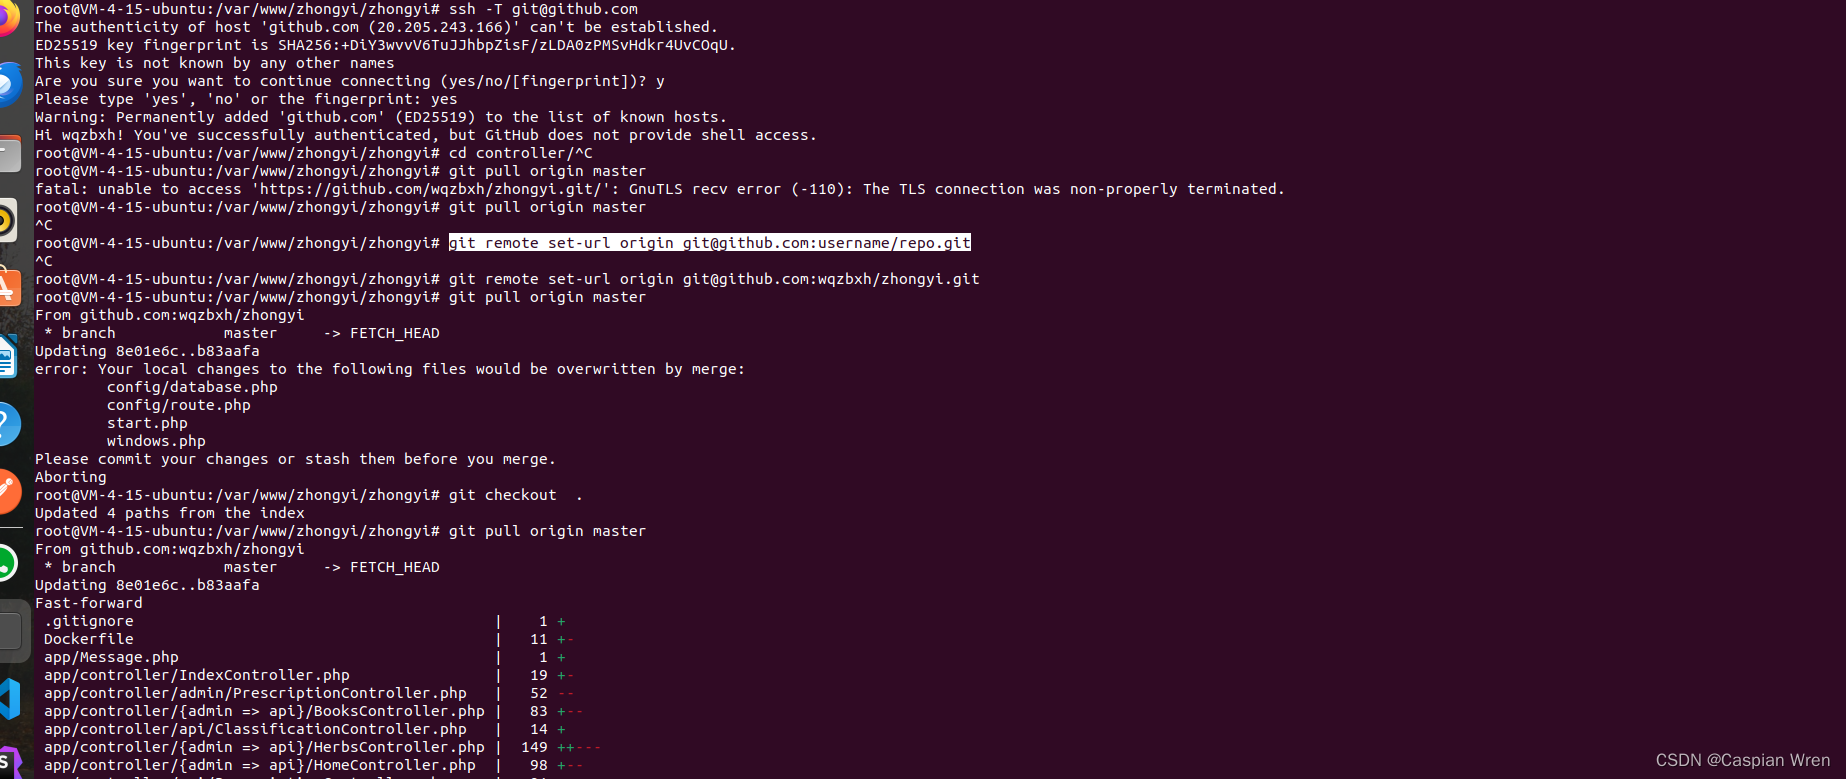
4. 测试 SSH 连接
运行以下命令来测试 SSH 连接:
ssh -T git@github.com如果一切设置正确,你应该看到一条欢迎消息。
5. 配置 Git 使用 SSH
如果你之前使用的是 HTTPS URL,现在你需要将 Git 仓库的远程 URL 更改为 SSH。使用以下命令:
git remote set-url origin git@github.com:username/repo.git
替换 username 和 repo 为你的 GitHub 用户名和仓库名称。
如:
git remote set-url origin git@github.com:wqzbxh/zhongyi.git
这样配置之后,你的 Git 就可以使用 SSH 协议进行操作,而不再需要每次都提供用户名和密码。确保你的 SSH 密钥得到妥善保管,并不会泄漏给不信任的人。
下面图片是实际全过程: