网站ftp用户名和密码seo服务销售招聘
一、红嘴蓝鹊优化器
红嘴蓝鹊优化器(Red-billed Blue Magpie Optimizer,RBMO)由Fu Shengwei 等人于2024年提出,其灵感来自红嘴蓝鹊的高效合作捕食行为,具体模拟了红嘴蓝鹊的搜索、追逐、攻击猎物和食物储存行为。

参考文献
[1]Fu, S., Li, K., Huang, H. et al. Red-billed blue magpie optimizer: a novel metaheuristic algorithm for 2D/3D UAV path planning and engineering design problems. Artif Intell Rev 57, 134 (2024). Red-billed blue magpie optimizer: a novel metaheuristic algorithm for 2D/3D UAV path planning and engineering design problems | Artificial Intelligence Review
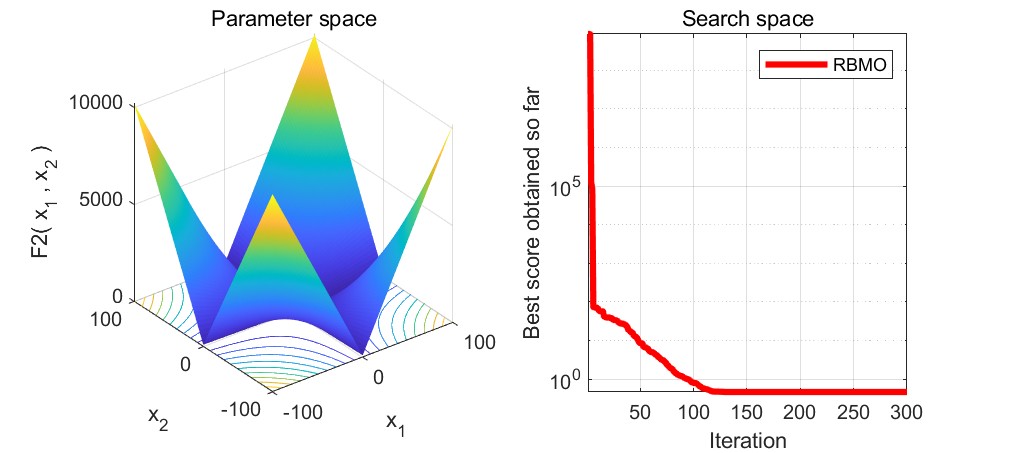
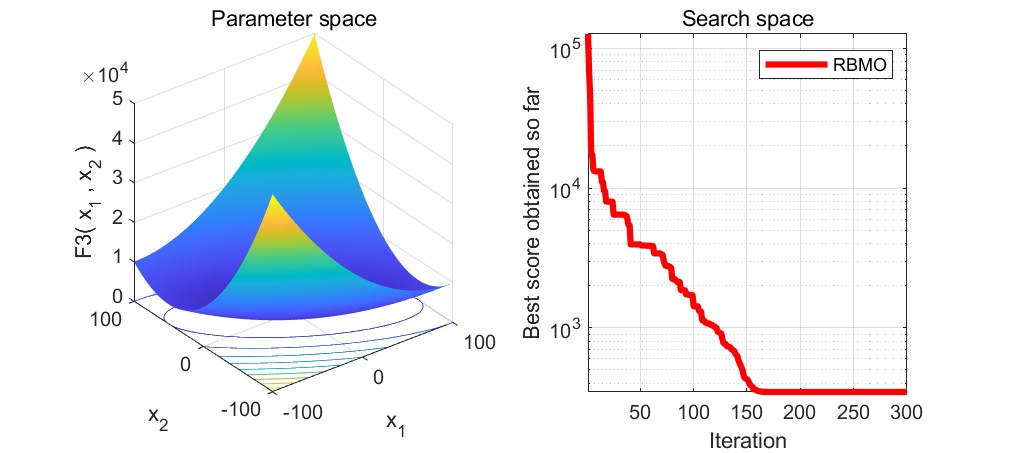
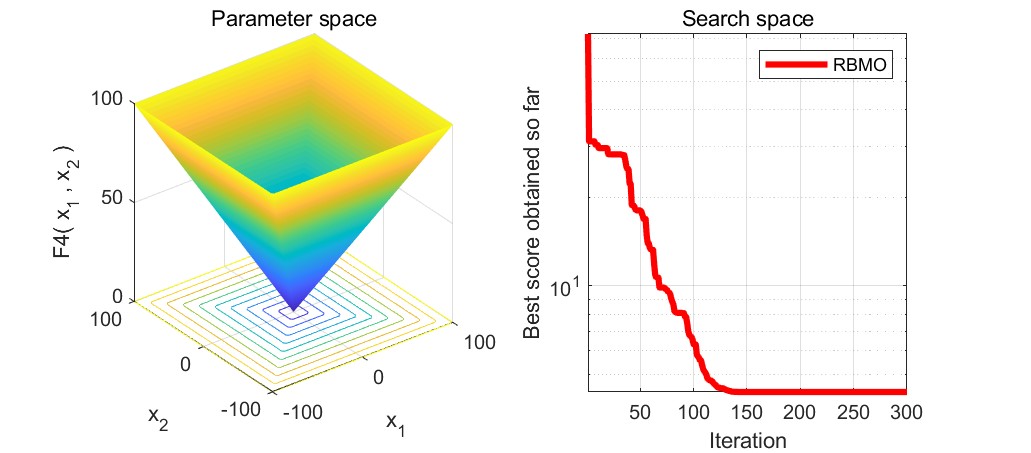
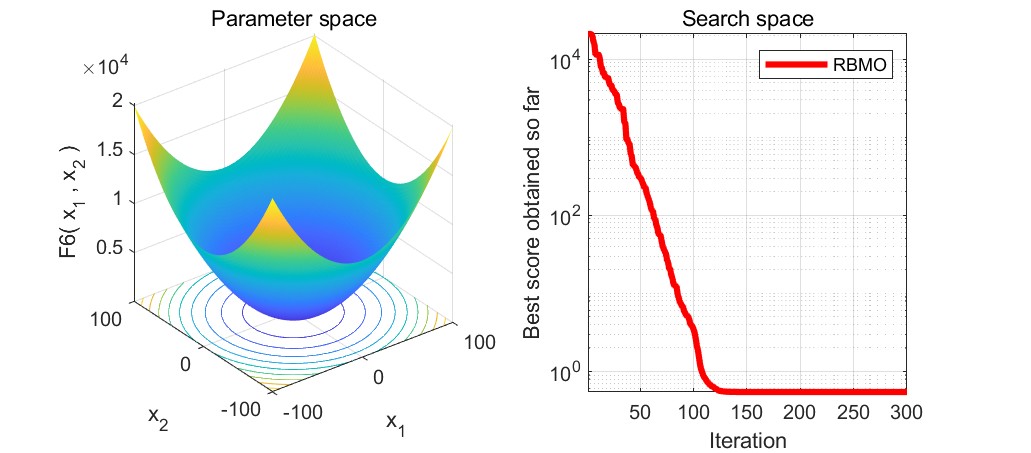
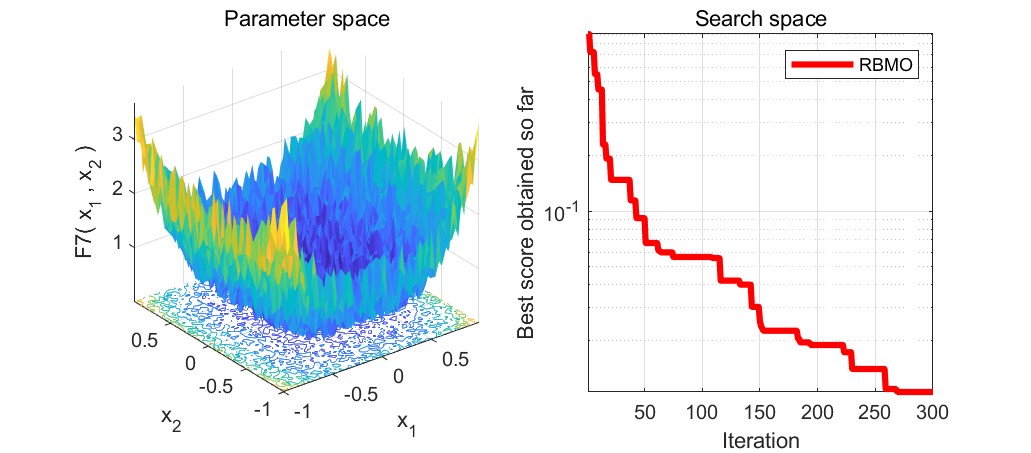
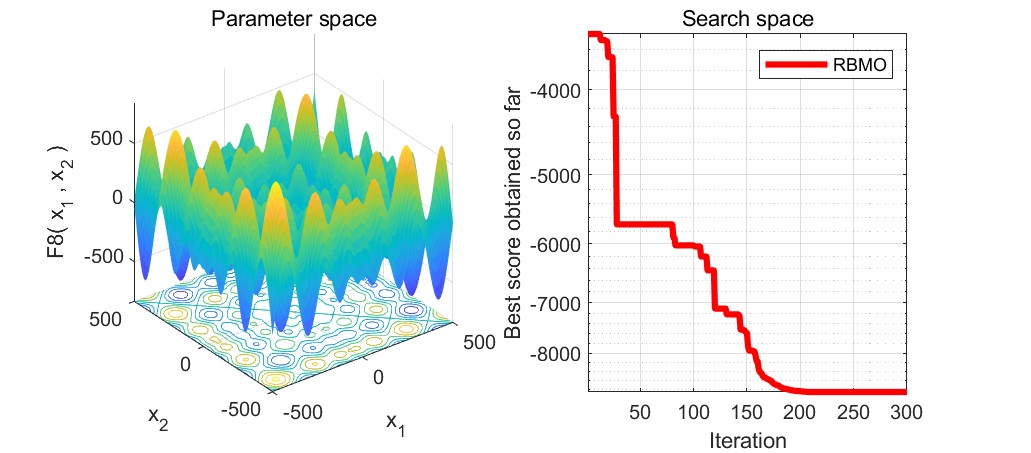
二、23个函数介绍
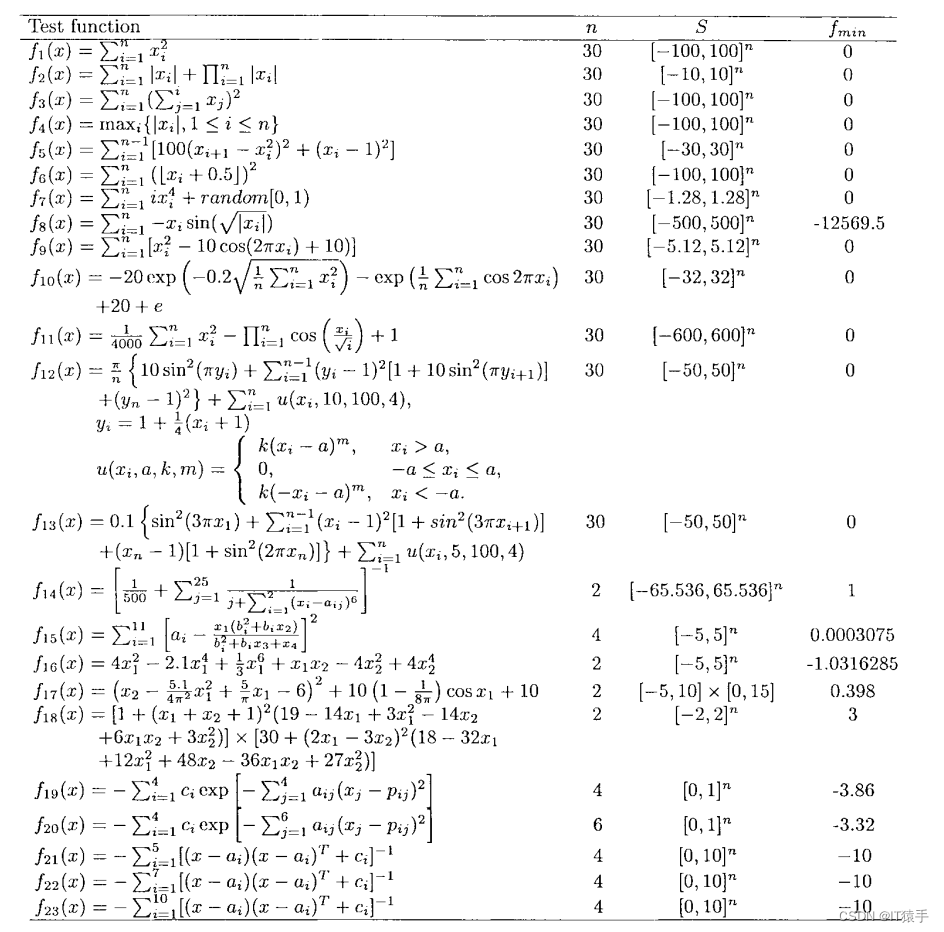
参考文献:
[1] Yao X, Liu Y, Lin G M. Evolutionary programming made faster[J]. IEEE transactions on evolutionary computation, 1999, 3(2):82-102.
三、部分代码
close all ;
clear
clc
Npop=30;
Function_name='F6';     % Name of the test function that can be from F1 to F23 (
Tmax=300;
[lb,ub,dim,fobj]=Get_Functions_details(Function_name);
[Best_fit,Best_pos,Convergence_curve]=RBMO(Npop,Tmax,lb,ub,dim,fobj);
figure('Position',[100 100 660 290])
%Draw search space
subplot(1,2,1);
func_plot(Function_name);
title('Parameter space')
xlabel('x_1');
ylabel('x_2');
zlabel([Function_name,'( x_1 , x_2 )'])
%Draw objective space
subplot(1,2,2);
semilogy(Convergence_curve,'Color','r','linewidth',3)
title('Search space')
xlabel('Iteration');
ylabel('Best score obtained so far');
axis tight
grid on
box on
legend('RBMO')
saveas(gca,[Function_name '.jpg']);
display(['The best solution is ', num2str(Best_pos)]);
display(['The best fitness value is ', num2str(Best_fit)]);
四、部分结果