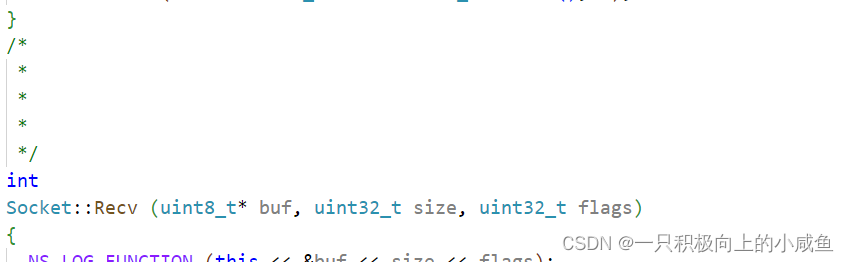
以下哪一项不属于seo对网站推广的作用,wordpress 2.0 下载地址,网站搜索框,软件开发的流程是什么最近项目原因可能会继续开始使用MyBatis#xff0c;已经习惯于spring-data的风格#xff0c;再回头看xml的映射配置总觉得不是特别舒服#xff0c;接口定义与映射离散在不同文件中#xff0c;使得阅读起来并不是特别方便。
Spring中整合MyBatis就不多说了#xff0c;最近…最近项目原因可能会继续开始使用MyBatis已经习惯于spring-data的风格再回头看xml的映射配置总觉得不是特别舒服接口定义与映射离散在不同文件中使得阅读起来并不是特别方便。
Spring中整合MyBatis就不多说了最近大量使用Spring Boot因此整理一下Spring Boot中整合MyBatis的步骤。搜了一下Spring Boot整合MyBatis的文章方法都比较老比较繁琐。查了一下文档实际已经支持较为简单的整合与使用。下面就来详细介绍如何在Spring Boot中整合MyBatis并通过注解方式实现映射。
整合MyBatis
新建Spring Boot项目或以Chapter1为基础来操作 pom.xml中引入依赖 这里用到spring-boot-starter基础和spring-boot-starter-test用来做单元测试验证数据访问引入连接mysql的必要依赖mysql-connector-java引入整合MyBatis的核心依赖mybatis-spring-boot-starter这里不引入spring-boot-starter-jdbc依赖是由于mybatis-spring-boot-starter中已经包含了此依赖 parent groupIdorg.springframework.boot/groupId artifactIdspring-boot-starter-parent/artifactId version1.3.2.RELEASE/version relativePath/ !-- lookup parent from repository --/parentdependencies dependency groupIdorg.springframework.boot/groupId artifactIdspring-boot-starter/artifactId /dependency dependency groupIdorg.springframework.boot/groupId artifactIdspring-boot-starter-test/artifactId scopetest/scope /dependency dependency groupIdorg.mybatis.spring.boot/groupId artifactIdmybatis-spring-boot-starter/artifactId version1.1.1/version /dependency dependency groupIdmysql/groupId artifactIdmysql-connector-java/artifactId version5.1.21/version /dependency/dependencies同之前介绍的使用jdbc和spring-data连接数据库一样在application.properties中配置mysql的连接配置
spring.datasource.urljdbc:mysql://localhost:3306/testspring.datasource.usernamerootspring.datasource.password123456spring.datasource.driver-class-namecom.mysql.jdbc.Driver同其他Spring Boot工程一样简单且简洁的的完成了基本配置下面看看如何在这个基础下轻松方便的使用MyBatis访问数据库。
使用MyBatis
在Mysql中创建User表包含id(BIGINT)、name(INT)、age(VARCHAR)字段。同时创建映射对象User
public class User { private Long id; private String name; private Integer age; // 省略getter和setter}创建User映射的操作UserMapper为了后续单元测试验证实现插入和查询操作
Mapperpublic interface UserMapper { Select(SELECT * FROM USER WHERE NAME #{name}) User findByName(Param(name) String name); Insert(INSERT INTO USER(NAME, AGE) VALUES(#{name}, #{age})) int insert(Param(name) String name, Param(age) Integer age);}创建Spring Boot主类
SpringBootApplicationpublic class Application { public static void main(String[] args) { SpringApplication.run(Application.class, args); }}创建单元测试 测试逻辑插入一条nameAAAage20的记录然后根据nameAAA查询并判断age是否为20测试结束回滚数据保证测试单元每次运行的数据环境独立
RunWith(SpringJUnit4ClassRunner.class)SpringApplicationConfiguration(classes Application.class)public class ApplicationTests { Autowired private UserMapper userMapper; Test Rollback public void findByName() throws Exception { userMapper.insert(AAA, 20); User u userMapper.findByName(AAA); Assert.assertEquals(20, u.getAge().intValue()); }}代码示例
本文的相关例子可以查看下面仓库中的chapter3-2-7目录
Githubhttps://github.com/dyc87112/SpringBoot-LearningGiteehttps://gitee.com/didispace/SpringBoot-Learning
如果您觉得本文不错欢迎Star支持您的关注是我坚持的动力
【转载请注明出处】http://blog.didispace.com/springbootmybatis/