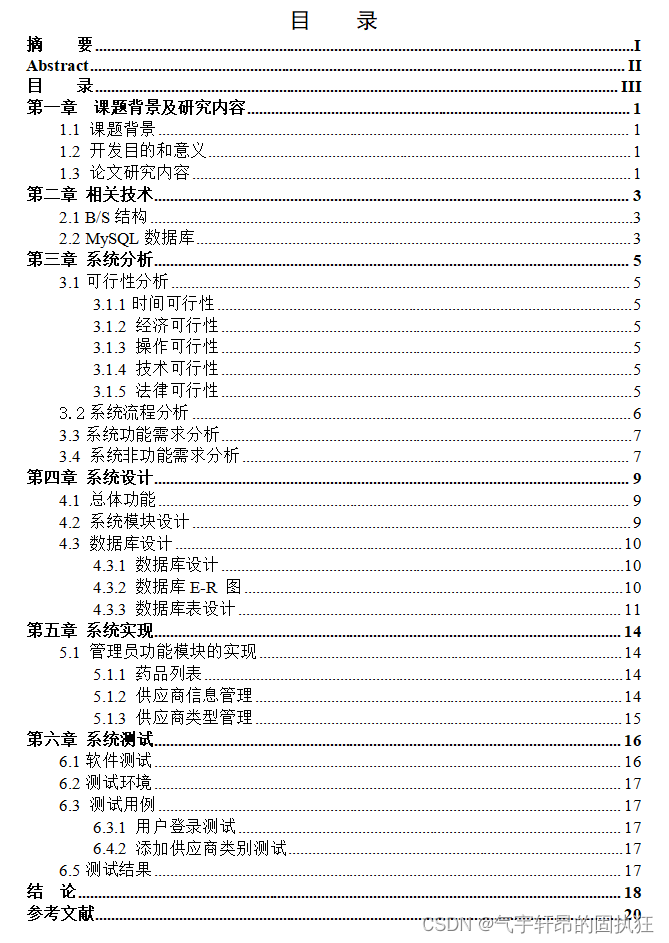
网站如何不需要备案,微信销售平台,calypso wordpress,工程建设是干什么的1 功能实现
初始会显示我们之前 SfM 做出的点云#xff0c;包括相机位置可以点击右上角加载你本地的PCD文件可以通过选择多个文件加载多个点云并显示在同一场景中可以通过左上角的控制界面查看/调整点云的属性#xff0c;如点大小、颜色等可以通过右上角的控制界面选择旋转 …1 功能实现
初始会显示我们之前 SfM 做出的点云包括相机位置可以点击右上角加载你本地的PCD文件可以通过选择多个文件加载多个点云并显示在同一场景中可以通过左上角的控制界面查看/调整点云的属性如点大小、颜色等可以通过右上角的控制界面选择旋转 / 显示点云颜色只有有颜色数据的PCD点云在开启该选项后会显示原本的颜色其他的会消失窗口大小变化时渲染器和相机会自动适应新的窗口尺寸
实现效果 2 具体实现
本项目是基于 Three.js 实现的简单一个Web应用程序用于可视化三维点云数据。具体目的包括
使用Three.js库创建三维场景实现点云数据的加载、显示和交互控制实现的用户界面GUI设置和控制处理多个点云数据的加载和展示
使用 VSCode 的 Live Serve 搭建网络编程的环境采用CDN的方式引入 Three.js (版本r158)
2.1 html
!DOCTYPE html
htmlheadmeta charsetutf-8titlePCD visulize/titlestylebody {margin: 0;}/style
/headbodyscript typeimportmap{imports: {three: https://cdn.jsdelivr.net/npm/three0.158.0/build/three.module.js,three/addons/: https://cdn.jsdelivr.net/npm/three0.158.0/examples/jsm/}}/scriptscript typemodule srcjs/main.js /script
/body/html2.2 js
在 js 文件中就是我们的主要实现内容了
2.2.1 引入
由之前的 html 文件中定义的 importmap其定义了three和three/addons/我们就可以采用官方的 import 路径了之后要改变引入 Three.js 的方式也只需要在 importmap 中修改即可
import * as THREE from three;
import { OrbitControls } from three/addons/controls/OrbitControls.js;
import { PCDLoader } from three/addons/loaders/PCDLoader.js;
import { GUI } from three/addons/libs/lil-gui.module.min.js;2.2.2 Three.js 三大件
场景Scene相机Camera渲染器Renderer
同时设置窗口被调整大小时使画布相机自适应改变
const scene new THREE.Scene();const camera new THREE.PerspectiveCamera(80, window.innerWidth / window.innerHeight, 0.01, 10000000);
camera.position.set(0, 0, 10);const renderer new THREE.WebGLRenderer();
renderer.setSize(window.innerWidth, window.innerHeight);
document.body.appendChild(renderer.domElement);// onresize 事件会在窗口被调整大小时发生
window.onresize function () {// 重置渲染器输出画布相机renderer.setSize(window.innerWidth, window.innerHeight);camera.aspect window.innerWidth / window.innerHeight;camera.updateProjectionMatrix();
};
2.2.3 GUI
创建一个用于调整与点云相关参数的图形用户界面
初始化了一个 GUI 实例然后定义了一个 resetGUI 函数该函数销毁现有的 GUI 并创建一个新的 GUI —— 为了之后选择新文件时刷新GUI
var gui new GUI();
var attributesFolder gui.addFolder(点云设置);
gui.domElement.style.left 0px;function resetGUI() {// 删除之前的GUIgui.destroy();// 创建一个新的GUI实例gui new GUI();// gui.add(isRotation, bool).name(旋转);attributesFolder gui.addFolder(点云设置);gui.domElement.style.left 0px;
}2.2.4 初始点云显示 创建了四个辅助相机并将它们添加到场景中为每个辅助相机应用了一个变换矩阵这个矩阵定义了相机的位置和方向 没什么用之后加载其他pcd时就会被删除主要拿来应付一下实验要求的 加载了一个点云文件并将其添加到场景中 在 GUI 中添加了一个文件夹用于显示和修改点云的属性 创建了四个 camera helper 并将它们添加到场景中
// 创建四个透视相机 ———— 作为生成该点云的相机展示
var helpCamera [];
for (let i 0; i 4; i) {helpCamera[i] new THREE.PerspectiveCamera(60, 1, 0.1, 0.4);scene.add(helpCamera[i]);
}// 用SfM中dedao定义相机变换矩阵并应用到相应的相机上
const transformMatrix0 new THREE.Matrix4();
// ... (矩阵参数)
helpCamera[0].applyMatrix4(transformMatrix0);// 同理为其他相机定义矩阵并应用
// transformMatrix1, transformMatrix2, transformMatrix3// 创建点云加载器
const loader new PCDLoader();
// 加载点云模型
loader.load(./images/point_cloud.pcd, function (points) {// 将点云几何居中并绕X轴旋转180度points.geometry.center();points.geometry.rotateX(Math.PI);// 创建点云材质const material new THREE.PointsMaterial({ color: 0xffffff, size: 0.08, vertexColors: true });// 创建点云对象const pointCloud new THREE.Points(points.geometry, material);scene.add(pointCloud);// 使四个相机朝向点云for (let i 0; i helpCamera.length; i) {helpCamera[i].lookAt(pointCloud.position);}// 在 GUI 中添加点云相关设置const folder attributesFolder.addFolder(点云 0);const text { pointsNum: points.geometry.attributes.position.count, file: 初始pcd };folder.add(text, file).name(文件);folder.add(text, pointsNum).name(点数);folder.add(material, size, 0, 2).name(点大小);folder.addColor(material, color).name(点颜色);folder.add(material, vertexColors).name(显示顶点颜色).onChange(function () {material.needsUpdate true; // 需要手动更新材质否则没作用});// 为每个相机创建CameraHelper对象并显示出来const helpers [];for (let i 0; i 4; i) {helpers[i] new THREE.CameraHelper(helpCamera[i]);scene.add(helpers[i]);}
});
2.2.5 上传显示PCD
文件选择和按钮 创建了一个按钮和一个 input 元素用于触发文件选择按钮的点击事件触发了 input 的点击以便用户选择文件
// 用于控制是否旋转的变量
const isRotation { bool: false };// 创建文件选择的 input 元素和按钮
const input document.createElement(input);
const button document.createElement(button);
button.textContent 选择文件 (可选择多个);
button.style.position absolute;
button.style.top 10px;
button.style.right 10px;// 当按钮被点击时触发文件选择
button.onclick function () {input.click();
};
document.body.appendChild(button);// 配置 input 元素的属性
input.type file;
input.accept .pcd;
input.multiple true;
input.style.display none;文件选择回调函数
当文件选择发生变化时触发了 onchange 事件对选中的每个文件进行处理清除场景中之前的点云和相机助手 CameraHelper对选中的每个文件使用 FileReader 读取文件内容然后使用 PCDLoader 加载点云数据加载后对点云进行几何变换创建点云材质以及相应的点云对象
// 当文件选择发生变化时触发的回调函数
input.onchange function (event) {// 获取选中的文件列表const files event.target.files;const materials [];const pointClouds [];// 清除场景中所有点云和CameraHelperfor (let i 0; i scene.children.length; i) {const object scene.children[i];scene.remove(object);}for (let i 0; i 4; i) {scene.remove(helpers[i]);}// 遍历选中的每个文件for (let i 0; i files.length; i) {const file files[i];const reader new FileReader();// 读取文件reader.readAsDataURL(file);reader.onload function () {const data reader.result; // data 就是该文件的 URL// 使用 PCDLoader 加载点云数据const loader new PCDLoader();loader.load(data, function (points) {// 移除场景中的第一个对象之前的点云scene.remove(scene.children[0]);// 对点云进行一些几何变换points.geometry.center();points.geometry.rotateX(Math.PI);// 创建点云材质var material new THREE.PointsMaterial({ color: Math.random() * 0xffffff, size: 0.1, vertexColors: false });materials.push(material);// 创建点云对象const pointCloud new THREE.Points(points.geometry, material);pointClouds.push(pointCloud);// 当所有点云数据都加载完成后if (pointClouds.length files.length) {// 将所有点云添加到场景中for (let j 0; j pointClouds.length; j) {scene.add(pointClouds[j]);}// 重置 GUIresetGUI();// 在 GUI 中添加是否旋转的控制按钮gui.add(isRotation, bool).name(旋转);// 为每个点云创建 GUI 控件for (let j 0; j materials.length; j) {const material materials[j];const points pointClouds[j];const file files[j];// 为每个点云创建一个文件夹const folder attributesFolder.addFolder(点云 ${j 1});// 添加文件和点数信息到 GUIconst text { pointsNum: points.geometry.attributes.position.count, file: file.name };folder.add(text, file).name(文件);folder.add(text, pointsNum).name(点数);// 添加控制点云的点大小、颜色等属性到 GUIfolder.add(material, size, 0, 2).name(点大小);folder.addColor(material, color).name(点颜色);folder.add(material, vertexColors).name(显示顶点颜色).onChange(function () {material.needsUpdate true; // 手动更新材质});}// 设置相机的位置为点云的中心再向后移动一段距离const box new THREE.Box3().setFromObject(scene);const center box.getCenter(new THREE.Vector3());const size box.getSize(new THREE.Vector3());camera.position.copy(center);camera.position.z size.length();camera.lookAt(center);}});};}
};2.2.6 主循环
一个简单的主循环
function animate() {// 如果 isRotation.bool 为真则在每一帧中旋转场景if (isRotation.bool) {scene.rotation.y 0.005;}// 渲染场景renderer.render(scene, camera);// 通过递归调用自身实现持续动画requestAnimationFrame(animate);
}// 初始调用动画函数
animate();2.3 完整代码js
html 的代码之前已经完整给出下面为 main.js 的完整代码
import * as THREE from three;
import { OrbitControls } from three/addons/controls/OrbitControls.js;
import { PCDLoader } from three/addons/loaders/PCDLoader.js;
import { GUI } from three/addons/libs/lil-gui.module.min.js;const scene new THREE.Scene();const camera new THREE.PerspectiveCamera(80, window.innerWidth / window.innerHeight, 0.01, 10000000);
camera.position.set(0, 0, 10);const renderer new THREE.WebGLRenderer();
renderer.setSize(window.innerWidth, window.innerHeight);
document.body.appendChild(renderer.domElement);// 简单文字介绍放在页面最上端
const title1 document.createElement(h4);
title1.textContent PLUS-WAVE\s PCD加载器;
title1.style.position absolute;
title1.style.top 1%;
title1.style.left 42%;
title1.style.color white;
document.body.appendChild(title1);const title2 document.createElement(h5);
title2.innerHTML 点击右上角按钮选择文件br(看不见点云的话记得改改颜色或者缩放);
title2.style.position absolute;
title2.style.top 4%;
title2.style.left 41%;
title2.style.color white;
title2.style.textAlign center;
document.body.appendChild(title2);const controls new OrbitControls(camera, renderer.domElement);var gui new GUI();
var attributesFolder gui.addFolder(点云设置);
gui.domElement.style.left 0px;function resetGUI() {// 删除之前的GUIgui.destroy();// 创建一个新的GUI实例gui new GUI();// gui.add(isRotation, bool).name(旋转);attributesFolder gui.addFolder(点云设置);gui.domElement.style.left 0px;}// 创建四个透视相机 ———— 作为生成该点云的相机展示
var helpCamera [];
for (let i 0; i 4; i) {helpCamera[i] new THREE.PerspectiveCamera(60, 1, 0.1, 0.4);scene.add(helpCamera[i]);
}// 用SfM中dedao定义相机变换矩阵并应用到相应的相机上
const transformMatrix0 new THREE.Matrix4();
transformMatrix0.set(0.9635227966591445, -0.0298251417806896, -0.2659591721221557, -3.1861460134378618,0.04168012934974072, 0.9983679551673119, 0.03904091331448917, -0.0658694912288581,0.264360714054735, -0.04870202267670474, 0.963193400024973, 1.701830863209624117,0, 0, 0, 1
);
helpCamera[0].applyMatrix4(transformMatrix0);const transformMatrix1 new THREE.Matrix4();
transformMatrix1.set(0.8671344194352608, -0.01285630331924969, -0.4979082386300075, -1.981515886805006,0.03166906549661311, 0.9990671872561505, 0.02935686697614572, -0.0212592897059282,0.4970663626933977, -0.04122463842227529, 0.8667326925100427, 2.75149718348900723,0, 0, 0, 1
);
helpCamera[1].applyMatrix4(transformMatrix1);const transformMatrix2 new THREE.Matrix4();
transformMatrix2.set(0.7024094659673048, -0.007144654873624021, -0.711737238049452, -2.685856668225444,0.09031055886130245, 0.9927625554048429, 0.07916130079909767, -0.0514197827631538,0.7060204990492023, -0.1198810347502172, 0.6979710541487608, 2.332535510893329,0, 0, 0, 1
);
helpCamera[2].applyMatrix4(transformMatrix2);const transformMatrix3 new THREE.Matrix4();
transformMatrix3.set(0.5308375671028522, 0.00925889315102485, -0.8474230054995811, -3.381832006499801,0.1320681431688673, 0.9868199683489367, 0.09351125936341173, -0.0917595736102196,0.8371197542241209, -0.1615568722321077, 0.5226183063406084, 1.036010012067961,0, 0, 0, 1
);
helpCamera[3].applyMatrix4(transformMatrix3);const helpers [];// 创建点云加载器
const loader new PCDLoader();
// 加载点云模型
loader.load(./images/point_cloud.pcd, function (points) {// 将点云几何居中并绕X轴旋转180度points.geometry.center();points.geometry.rotateX(Math.PI);// 创建点云材质const material new THREE.PointsMaterial({ color: 0xffffff, size: 0.08, vertexColors: true });// 创建点云对象const pointCloud new THREE.Points(points.geometry, material);scene.add(pointCloud);// 使四个相机朝向点云for (let i 0; i helpCamera.length; i) {helpCamera[i].lookAt(pointCloud.position);}// 在 GUI 中添加点云相关设置const folder attributesFolder.addFolder(点云 0);const text { pointsNum: points.geometry.attributes.position.count, file: 初始pcd };folder.add(text, file).name(文件);folder.add(text, pointsNum).name(点数);folder.add(material, size, 0, 2).name(点大小);folder.addColor(material, color).name(点颜色);folder.add(material, vertexColors).name(显示顶点颜色).onChange(function () {material.needsUpdate true; // 需要手动更新材质否则没作用});// 为每个相机创建CameraHelper对象并显示出来const helpers [];for (let i 0; i 4; i) {helpers[i] new THREE.CameraHelper(helpCamera[i]);scene.add(helpers[i]);}
});// 用于控制是否旋转的变量
const isRotation { bool: false };// 创建文件选择的 input 元素和按钮
const input document.createElement(input);
const button document.createElement(button);
button.textContent 选择文件 (可选择多个);
button.style.position absolute;
button.style.top 10px;
button.style.right 10px;// 当按钮被点击时触发文件选择
button.onclick function () {input.click();
};
document.body.appendChild(button);// 配置 input 元素的属性
input.type file;
input.accept .pcd;
input.multiple true;
input.style.display none;// 当文件选择发生变化时触发的回调函数
input.onchange function (event) {// 获取选中的文件列表const files event.target.files;const materials [];const pointClouds [];// 清除场景中所有点云和CameraHelperfor (let i 0; i scene.children.length; i) {const object scene.children[i];scene.remove(object);}for (let i 0; i 4; i) {scene.remove(helpers[i]);}// 遍历选中的每个文件for (let i 0; i files.length; i) {const file files[i];const reader new FileReader();// 读取文件reader.readAsDataURL(file);reader.onload function () {const data reader.result; // data 就是该文件的 URL// 使用 PCDLoader 加载点云数据const loader new PCDLoader();loader.load(data, function (points) {// 移除场景中的第一个对象之前的点云scene.remove(scene.children[0]);// 对点云进行一些几何变换points.geometry.center();points.geometry.rotateX(Math.PI);// 创建点云材质var material new THREE.PointsMaterial({ color: Math.random() * 0xffffff, size: 0.1, vertexColors: false });materials.push(material);// 创建点云对象const pointCloud new THREE.Points(points.geometry, material);pointClouds.push(pointCloud);// 当所有点云数据都加载完成后if (pointClouds.length files.length) {// 将所有点云添加到场景中for (let j 0; j pointClouds.length; j) {scene.add(pointClouds[j]);}// 重置 GUIresetGUI();// 在 GUI 中添加是否旋转的控制按钮gui.add(isRotation, bool).name(旋转);// 为每个点云创建 GUI 控件for (let j 0; j materials.length; j) {const material materials[j];const points pointClouds[j];const file files[j];// 为每个点云创建一个文件夹const folder attributesFolder.addFolder(点云 ${j 1});// 添加文件和点数信息到 GUIconst text { pointsNum: points.geometry.attributes.position.count, file: file.name };folder.add(text, file).name(文件);folder.add(text, pointsNum).name(点数);// 添加控制点云的点大小、颜色等属性到 GUIfolder.add(material, size, 0, 2).name(点大小);folder.addColor(material, color).name(点颜色);folder.add(material, vertexColors).name(显示顶点颜色).onChange(function () {material.needsUpdate true; // 手动更新材质});}// 设置相机的位置为点云的中心再向后移动一段距离const box new THREE.Box3().setFromObject(scene);const center box.getCenter(new THREE.Vector3());const size box.getSize(new THREE.Vector3());camera.position.copy(center);camera.position.z size.length();camera.lookAt(center);}});};}
};// onresize 事件会在窗口被调整大小时发生
window.onresize function () {// 重置渲染器输出画布相机renderer.setSize(window.innerWidth, window.innerHeight);camera.aspect window.innerWidth / window.innerHeight;camera.updateProjectionMatrix();
};function animate() {// 如果 isRotation.bool 为真则在每一帧中旋转场景if (isRotation.bool) {scene.rotation.y 0.005;}// 渲染场景renderer.render(scene, camera);// 通过递归调用自身实现持续动画requestAnimationFrame(animate);
}// 初始调用动画函数
animate();